Frequently Asked Questions in Technology (Part 6)
October 27, 2021
Different Data Center Fire Suppression Systems Explained
October 29, 2021Technology has come a long way in many aspects and almost every possible avenue. There are technological advancements that are happening every single day, but there was a time when the future of technology seemed to be on the decline. It was in the mid-2000s when colleges and universities realized that fewer students were registering for computer science programs. What was even more interesting is that the students who were enrolling in these programs didn’t have the same amount of computer science knowledge as previous generations. Although major technological advancements were happening at the time these were coming from a previous generation of computer science students from the 1980—the generation that had to program their computers.
This realization gave birth to the Raspberry Pi Foundation by the University of Cambridge, which intended to create low-cost programmable computers for about the cost of a textbook. The idea was to give as many children a more hands-on experience of actual computer programmable computer hardware. Today, Raspberry Pi, the low-cost programmable tool, can do more than simply be a training tool for kids.
What Is a Raspberry Pi?
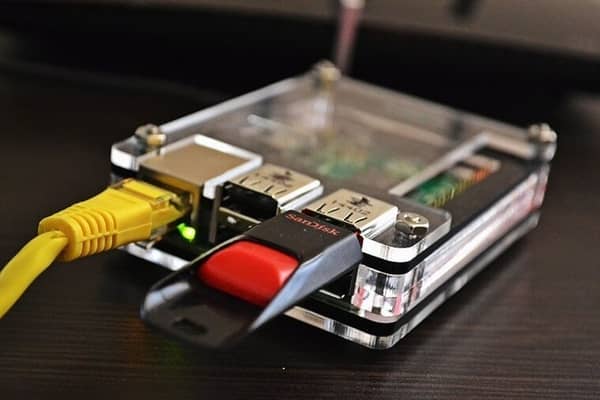
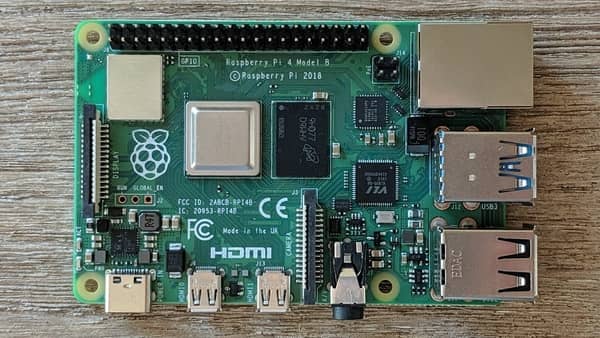
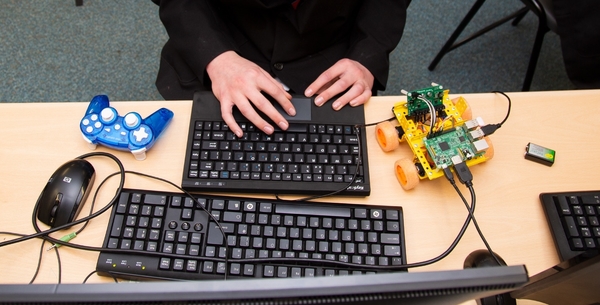
The Raspberry Pi is a low-cost computer programming training tool that is about the size of a credit card. The Raspberry Pi resembles a traditional motherboard with exposed parts and mounted computer chips. The Raspberry Pi comes in two different versions, Model A and Model B. Model B will cost a little more but has an added Ethernet and additional USB port. Both come with everything users need to connect any inputs and outputs for most devices. Raspberry Pi can be used to program in languages such as Python and Scratch. As it comes, it can also be programmed, configured, and used as a desktop computer. Users can do everything from word-processing, browse the internet, make spreadsheets, play games, and even play high-definition games.
Raspberry Pi can be configured for many different applications. The device is similar to the first home computers. It doesn’t come with internal storage or peripherals, but users can take this base and build just about anything from the ground up. Connecting the Raspberry Pi to a monitor, keyboard, SD card, and power supply would be the beginning of a personal computer. But users have realized that with this affordable computer programming tool—the possibilities are endless. Users can host a website and even an entire server with a Raspberry Pi.
How to Host a Personal Web Server with a Raspberry Pi?
A web server for personal use is just about the same thing as “the cloud” except users/operators control and maybe even more importantly, own all aspects of this personal cloud instead of one giant company like Amazon, Microsoft, Google, IBM, Apple, and more. There are many several different benefits of owning your web server. These benefits include free storage, unlimited customization, free Internet services, high-quality security, complete control over your content, and more. Hosting your own personal web server can also potentially save users over $100 a month.
The first step to building and hosting a personal web server with a Raspberry Pi is to gather the proper equipment and setting up the groundwork before the initial configuration. There are several things you will need to build and host your web server with a Raspberry Pi including a Raspberry Pi Model B, an SD memory card, a power adapter compatible with the MicroB connecter found on the Raspberry Pi, an ethernet patch cable, HDMI compatible, HDMI cable, and a USB keyboard. You will also need a USB micro SD card reader, ethernet cable, HDMI monitor, and router.
A Raspberry Pi needs to boot off an SD card loaded with an operating system disk image. SD cards may be purchased bland or already made bootable and complete with a Raspberry Pi operating system. There are several operating system versions for Raspberry Pi. This particular example uses Raspbian Wheezy.
Step 1
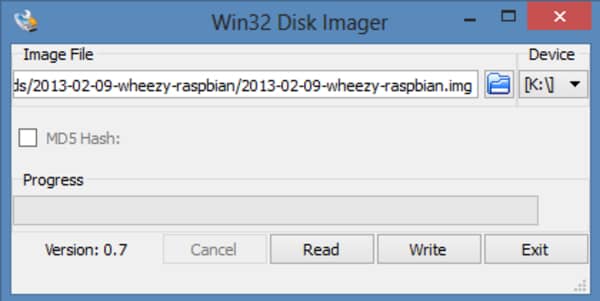
First, download the operating system disk image and write it onto your memory card. You can write the image using something like a Win32 Disk Imager. After the image is written onto the card, plug the memory card in the Raspberry Pi SD card reader. Once you have all the input and output devices (monitor, ethernet cable, keyboard, etc.) plugged in you can power on the device.
Step 2
The next step is the initial configuration. Once you have powered on the Raspberry Pi with the SD card plugged in, your monitor will read all of the operating system information and peripherals. Once the boot is complete there are changes you will need to make. First, expand the root partition so all the space is available for use on the SD card. The next step is to set the time zone, enable SSH server in the advanced options, and disable boot to desktop. Update the Raspberry Pi and reboot the system.
Step 3
After these settings have been configured you will set up the SSH. After the device reboots, it will ask for your login information. The default username is “pi” and the default password is “raspberry”. Next, find the IP address by using the command: ifconfig. Use this IP address as the Host Name and re-enter the default login information. Once you are logged in—change the password to your preference.
Step 4
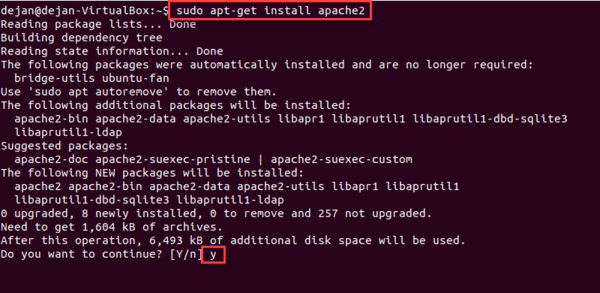
The fourth step is to install Apache.
Use the command: sudo apt-get install apache2 php5 libapache2-mod-php5
Follow the commands and restart your device. After the device reboots, go to your web browser of choice and type in the device’s IP address into the URL bar. After these steps, Apache should be installed.
Step 5
The next step is to install MySQL.
Use the command: sudo apt-get install mysql-server mysql-client php5-mysql
Type in Y (for yes) to continue the installation process. After the installation, it will ask you to enter a new password for MySQL root user. Type in your preferred password and complete the installation process.
Step 6
The sixth step is to install FTP. This allows you to transfer files to and from your device.
First, to take ownership of web root: Use the command: sudo chown -R pi /var/www
Next, install vsftpd. Use the command: sudo apt-get install vsftpd
After this is completed. You can start the configuration process. Edit the vsftpd.config file by using the command: sudo nano /etc/vsftpd.conf
Find and edit the lines below:
“anonymous_enable=YES” change this to “anonymous_enable=NO,”
Uncomment local_enable=YES
Uncomment write_enable=YES
Do this by removing the “#” in front of both lines. Now exit the editing page by pressing ctrl+X. And type Y (Yes) to confirm. Now, restart the FTP service.
Use the command: sudo service vsftpd restart
Step 7
The last step is to finalize all of your work. To do this, change the root password of your Raspberry Pi. Use the command: sudo password root
Next, add the user root as a mod. Use the command: sudo usermod -L root
Once this is complete, your Raspberry Pi is now set up as a personal server from which you can transfer files to and from by using your IP address.
Conclusion
What once started as an educational tool can be used for additional uses that can be beneficial for its users. The Raspberry Pi device can be used for several different things such as a wireless speaker, home automation system, retro gaming console, and more. If you’re looking to own your cloud system, it can even be used as a personal web server as shown above. This little device is the foundation of a lot of the technology that we are using today. It can be used as a training aid for young (and old) technology students, and it can be used for more practical uses as well.
